
How to implement jsonwebtoken with RS256 Algorithm in NodeJs.
Learn JWT in NodeJs.


JSON Web Token (JWT) is an open standard (RFC 7519) that defines a compact and self-contained way for securely transmitting information between parties as a JSON object. It can be used in several programming languages not only JavaScript. JWT provides different algorithms for its implementation with the commonly used one being the HS256 algorithm which is not very secure as compared to RS256 algorithm. The RS256 algorithm is better.
Here, you are going to learn how to use JWT with the RS256 alg. I will take you step by step on every detail. You will learn how to create you private and public keys which is one of the strong reasons why its very secure. One good thing about this is you can give the public key to third parties or other apps of same product instead of your secret key. Especially in situations where things have gotten too big and new apps will have to depend on the old one for authentication.
Tools we are going to use
- command line
- VSCode editor
- postman
Lets setup a small nodejs server before implementing the jwt RS256 algorithm for production of authorization tokens.
Create a folder on your desktop with the name auth-server, open it in the command line and type this command:
npm init
Follow all the instruction to create your package.json file. Install the following packages:
npm install express jsonwebtoken dotenv
create an entry file server.js at the in root of your folder. Add the code below as content:
import express from 'express';

const app = express();
const port = 6000;

app.post('/auth', (req, res) => {
    res.status(200).send({ status: 200, token: '' });
});

app.get('/my-route', (req, res) => {
    const sentToken = req.get('Authorization');
    if (!sentToken) {
        return res.status(401).send({ status: 401, message: 'No Authorization header sent.' });
    }
});

app.use('*', (req, res) => {
    return res.status(404).json({
      status: 404,
      message: 'No endpoint matches that URL',
    });
});

app.listen(port, () => {
    console.info(`Server is now listening!`);
});
Since we are going to be using ES6 version of javascript we need babel to transpile ES6 to ES5. To install babel run the command:
npm install @babel/core @babel/node @babel/preset-env --save-dev
In your root folder create a .babelrc file and add this
{
    "presets": ["@babel/preset-env"]
}
Starting the server
Install the Nodemon package as its going to help restart the server when ever a change is made.
npm install nodemon --save-dev
Open your package.json file and add a start script
"start": "nodemon --exec babel-node server.js",
Go to your command line and start the server with the command:
npm start
Voila! The server is running fine.
Creating the JWT keys
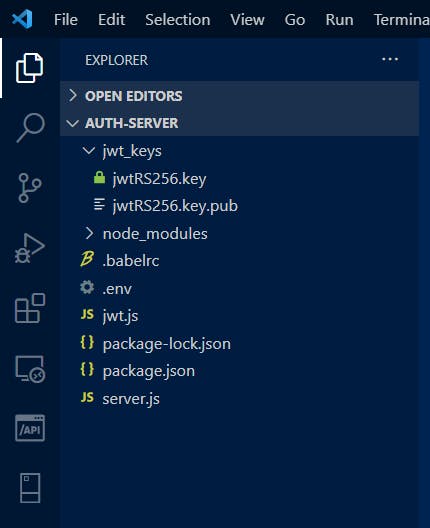
In your root folder create another folder jwt_keys and a new file jwt.js. First we have to write the function that will create the keys then we write the functions that read the keys. In the jwt.js file add the this:
import fs from 'fs';
import path from 'path';
import { generateKeyPair } from 'crypto';
import dotenv from 'dotenv';
import jwt from 'jsonwebtoken';

dotenv.config();

export const setJWT_KEYS = (secret = process.env.SECRET_KEY) => {
  const folderPath = path.resolve(`${__dirname}/jwt_keys`);
  generateKeyPair(
    'rsa',
    {
      modulusLength: 4096,
      publicKeyEncoding: {
        type: 'spki',
        format: 'pem',
      },
      privateKeyEncoding: {
        type: 'pkcs8',
        format: 'pem',
        cipher: 'aes-256-cbc',
        passphrase: secret,
      },
    },
    (err, publicKey, privateKey) => {
      fs.writeFileSync(`${folderPath}/jwtRS256.key`, privateKey, error => {
        if (error) throw error;
      });
      fs.writeFileSync(`${folderPath}/jwtRS256.key.pub`, publicKey, error => {
        if (error) throw error;
      });
    },
  );
};
Next, in the same root folder create .env file and save your secret key and token time in it
SECRET_KEY=secretkeykfshh
TOKEN_TIME=1d
Note that your secret key can be any random character. Import the setJWTKEYS function in the entry file like so and save:
import express from 'express';
import { setJWT_KEYS } from './jwt';

setJWT_KEYS();

const app = express();
const port = 6000;
You will notice that when the server completely restarts your private and public keys would have been created.
Next we have to provide the functions for encoding and verifying tokens. Before we do that lets remove the setJWT_KEYS() function from the server.js file, its job has been completed. The top of the entry file should look like this now
import express from 'express';

const app = express();
const port = 6000;
In the jwt.js file just before the setJWTKEYS function add the following variables
const folderPath =  path.resolve(`${__dirname}/jwt_keys`);
const JWT_PRIVATE_KEY = fs.readFileSync(`${folderPath}/jwtRS256.key`, 'utf8');
const JWT_PUBLIC_KEY = fs.readFileSync(`${folderPath}/jwtRS256.key.pub`, 'utf8');
const JWT_SECRET = process.env.SECRET_KEY;
const TOKEN_TIME = process.env.TOKEN_TIME;

export const setJWT_KEYS = (secret = process.env.SECRET_KEY) => {...}
Actually what we are doing here is to read the keys we created initially because that is what we will use to write (encode) and read (verify) our token. One line of code below the setJWTKEYS function add these two fuctions:
export const encodeToken = (object = {}) => {
    const options = {
      issuer: 'My App',
      algorithm: 'RS256',
      expiresIn: TOKEN_TIME,
    };
    const token = jwt.sign(
      object,
      { key: JWT_PRIVATE_KEY.replace(/\\n/gm, '\n'), passphrase: JWT_SECRET },
      options,
    );
    return token;
}

export const verifyToken = (sentToken) => {
    const options = {
      issuer: 'My App',
      algorithms: ['RS256'],
      maxAge: TOKEN_TIME,
    };
    const userToken = jwt.verify(
      sentToken,
      JWT_PUBLIC_KEY.replace(/\\n/gm, '\n'),
      options,
      (err, decode) => {
        if (err) {
          return { tokenExp: true, error: err };
        }
        return { tokenExp: false, decode };
      },
    );
    return userToken;
}
Testing the JWT setup
Import the encodeToken and verifyToken functions into the server.js file and make changes to the /auth and /my-route endpoints like so:
import express from 'express';
import { encodeToken, verifyToken } from './jwt';

const app = express();
const port = 6000;

app.post('/auth', (req, res) => {
    const token = encodeToken();
    res.status(200).send({ status: 200, token });
});

app.get('/my-route', (req, res) => {
    const sentToken = req.get('Authorization');
    if (!sentToken) {
        return res.status(401).send(
            { status: 401, message: 'No Authorization header sent.' }
        );
    }
    const decoded = verifyToken(sentToken);
    if (decoded.tokenExp)
        return res.status(401).send({ status: 401, message: 'Session has expired.' })
    res.status(200).send({ status: 200, message: 'Successfully authorized.' });
});
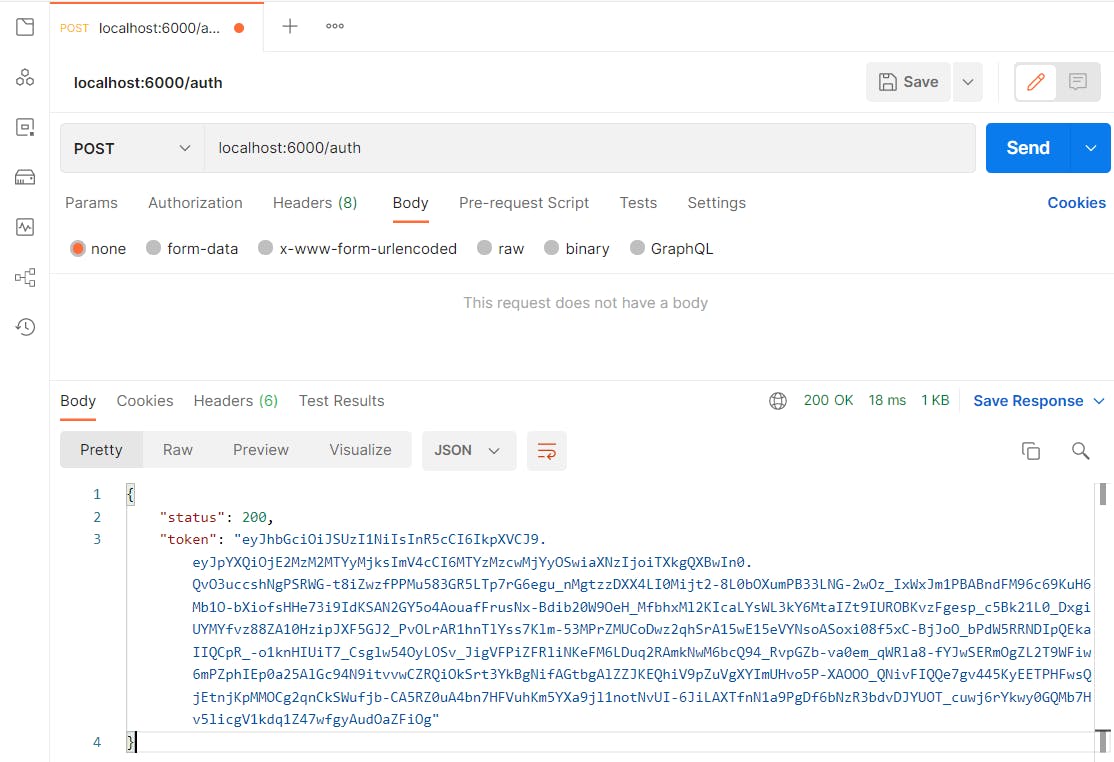
Open postman, select POST, type in the url localhost:6000/auth and send. The response will look similar this
{
    "status": 200,
    "token": "eyJhbGciOiJSUzI1NiIsInR5cCI6IkpXVCJ9.eyJpYXQiOjE2MzM2MTYyMjksImV4cCI6MTYzMzcwMjYyOSwiaXNzIjoiTXkgQXBwIn0.QvO3uccshNgPSRWG-t8iZwzfPPMu583GR5LTp7rG6egu_nMgtzzDXX4LI0Mijt2-8L0bOXumPB33LNG-2wOz_IxWxJm1PBABndFM96c69KuH6Mb1O-bXiofsHHe73i9IdKSAN2GY5o4AouafFrusNx-Bdib20W9OeH_MfbhxMl2KIcaLYsWL3kY6MtaIZt9IUROBKvzFgesp_c5Bk21L0_DxgiUYMYfvz88ZA10HzipJXF5GJ2_PvOLrAR1hnTlYss7Klm-53MPrZMUCoDwz2qhSrA15wE15eVYNsoASoxi08f5xC-BjJoO_bPdW5RRNDIpQEkaIIQCpR_-o1knHIUiT7_Csglw54OyLOSv_JigVFPiZFRliNKeFM6LDuq2RAmkNwM6bcQ94_RvpGZb-va0em_qWRla8-fYJwSERmOgZL2T9WFiw6mPZphIEp0a25AlGc94N9itvvwCZRQiOkSrt3YkBgNifAGtbgAlZZJKEQhiV9pZuVgXYImUHvo5P-XAOOO_QNivFIQQe7gv445KyEETPHFwsQjEtnjKpMMOCg2qnCkSWufjb-CA5RZ0uA4bn7HFVuhKm5YXa9jl1notNvUI-6JiLAXTfnN1a9PgDf6bNzR3bdvDJYUOT_cuwj6rYkwy0GQMb7Hv5licgV1kdq1Z47wfgyAudOaZFiOg"
}
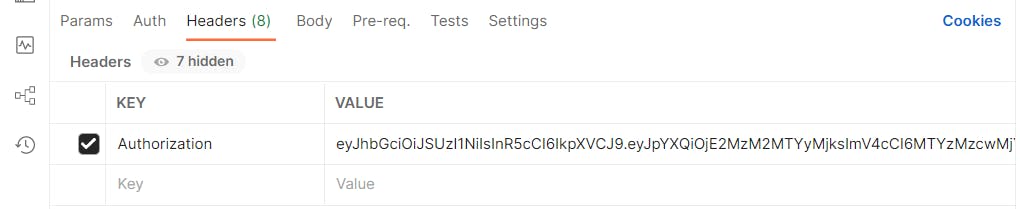
Okay! We've been able to produce a token, lets go on to verify the token. Copy the whole token string and open a new tab. click on headers end enter your toke as shown below:
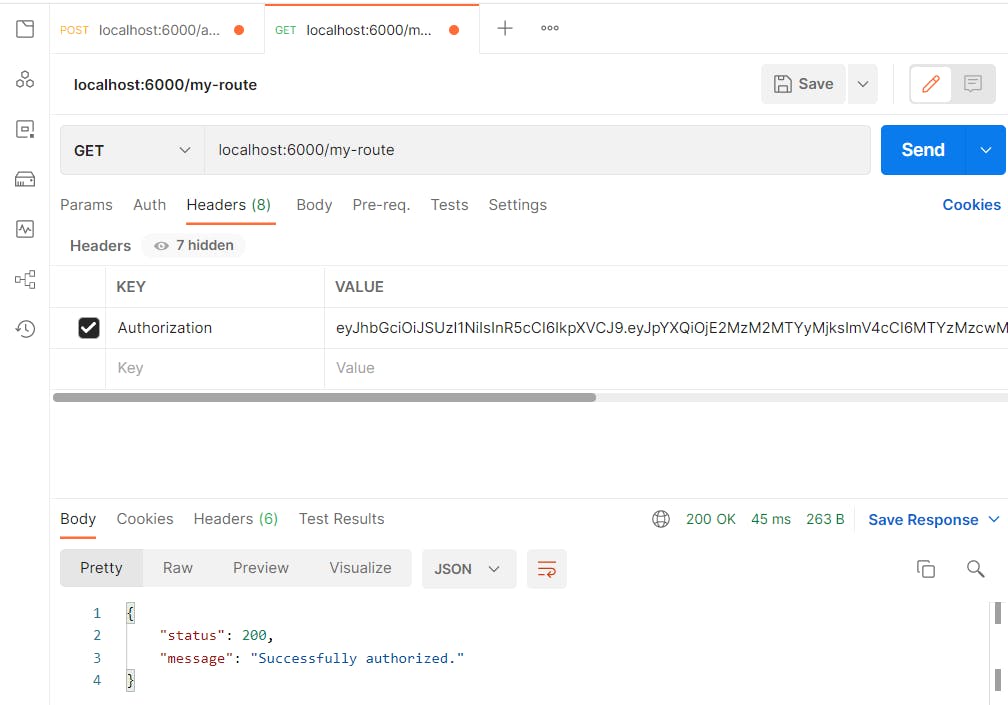
type in the url localhost:6000/my-route and send. There you have it, our token is authentic. The response body will be like this:
{
    "status": 200,
    "message": "Successfully authorized."
}
Conclusion
I made sure it is straight forward and easy. This is not a one size fit all and in your own time you can be innovative, do it in a format that best suits you. This article was to make you understand the concept. So far I hope I have been able to make you understand the RS256 jwt implementation. Gracias!
For further read on JWT, its different algorithms and programming language libraries visit the JWT website.